Showing posts with label helpful tips. Show all posts

Friday, July 16, 2021

Let's Look: Bathroom Organization

I love all things organization, so I was really excited when I saw this topic for this month's Let's Look series. One thing I learned lately is to have a storage container for EVERYTHING so you know exactly where it goes when you're done using it. I'm all about clear containers because if I don't see it, I don't use it. I can't wait to read some of your answers too so I can get some ideas on how to work on my "trouble area"- under the sink! 

So first off- here's my bathroom. It's more long than square. I live in a rented apartment, so I can't do anything about those sick yellow tiles except pair it with dark gray (my towels, rug, and shower curtain- at the top [not shown]). 


I try to keep my countertop mostly clear. I have a small basket for my nail polishes, a small ring holder that actually has sample size perfumes and safety pins (not sure why lol), 2 jars- one for Qtips and one cotton balls/pads, and then this corner caddy for hair and beauty products. (I don't wear much makeup, but the makeup I do own is stored on my dresser in my bedroom which is why you don't see any here.) Oh, and the waterpik I asked for one Christmas and still have never used (sorry Blue!) 

I mentioned jars. I love the looks of apothecary jars for storage, but I just cannot bring myself to spend $15 on a jar. I found this hack on Pinterest many moons ago and I love it! I purchase a lot of those BBW 3-wick candles. When it's empty/burnt out, I toss it in my freezer for a bit, and then scrape out the excess wax. I also found this way of cleaning them out using boiling water but I haven't tried it yet. Either way you do it you get an instant container- and less waste! 

Behind the mirror is where I store my mud masks, Band-Aids and Neosporin (easy access because I'm a clumsy girl!), and excess creams. 

I have two small, narrow drawers in the vanity. In one I store my toothpaste, a smaller face towel, and some random samples. In the other is my hair brush, glasses, extra contacts, bobby pins, and hair ties (and apparently tissues, a Tide stick(?), and a really old dip nail polish remover!). 


Above my toilet, I have the only piece of "art" in the bathroom, a poster that says "Enjoy the Journey" that I picked from TJ Maxx because of the gray background. On the lid, I keep my rubber duck collection (I work for a college and that's our mascot... and I also think they're cute). 


My under the sink storage could use some help. Right now I just have things lined up, and everything else thrown into a bucket. 


It's got a little bit of everything- hydrogen peroxide and iodine, contact solution, mouthwash, nail polish remover, sunscreen, femme products, my hairdryer, extra shampoo, conditioner, hairspray (listen, when there's a sale on Pantene I take advantage- don't judge me!), mosquito spray and bracelets. AND, what you can't really see, in one of those pouches in the back is just lipsticks, and the other is some more femme products. 


I put the bucket on my counter so I could get a better look at what was in it- basically pills (Dayquil/Nyquil/ Mucinex/Midol), a thermometer, first aid kit, a pack of unopened toothbrushes, an unopened loofah, razors (mostly unopened), a Rembrandt teeth cleaning kit (that I didn't realize I had)... other lol. 

What do you do for your under-the-sink storage? 

 Linking up with Erika and Shay!


Thursday, January 16, 2020

Keep It Together: My 2020 Planner

If you've been following along since last year, you'd know that I was none too happy that I waited too long last year and was unable to purchase the Happy Planner that I wanted, but I'm happy to report that this year it's back! I chose The Mini Happy Planner in Pastel Dreams (which is still on sale at Michael's!). I always choose a mini version because it's easier for me to tote around wherever I go, and tote around I do. I bring it with me almost everywhere, and use it daily. 


A few things I love about this planner: the size, the monthly and weekly views, layouts available (I prefer the horizontal layout), and the fact that I can add in/take out pages. I don't currently add in any pages, but I often take them out so it's easier for me to write without the rings getting in my way. 

As you can see, I don't "decorate" my planner in the traditional sense. It's not all that "pretty," but it's functional and does what i need it to do, which is help me keep track of things in my personal life. (I do not keep any work-related things in my planner; I prefer to keep work and personal separate, unless I need to know about a work-related function outside of normal working hours. We are all digital at work.)


So what's going in my planner? In the monthly view I include birthdays, appointments, and events. Only in January do I include the link-ups I want to participate in monthly and when the link-ups are live on the side. In other months this area might include events that I'm considering attending but haven't yet purchased tickets for/signed up for, or appointments that I need to make, but haven't made yet. 


In the weekly section I keep everything else. The second line is always for meal planning and the second to last line is always for linkups or blog post ideas. Check marks means I made the meal or posted. Saturday/Sunday are generally clear unless there's an event because I spend these days with Blue. In the bottom space I keep weekly notes such as things I need to do, groceries I need to buy for the meals I plan to make, and/or errands I need to run. 

And that's about it! I do have a scrapbook that I'm "working on," but I haven't actually done anything with it since the last time I posted about it. Hopefully next time I can share a bit more about that project!  


Do you use a paper planner, or do you keep a digital calendar? 
Linking up with Lauren, Alexandra, and Rebecca Jo...


And Ashley and Adrienne!


Thursday, November 14, 2019

10 Favorite Gifts To Give

*This post does NOT contain affiliate links.


As much as I dislike Christmas (I know, total Grinch over here), I love buying presents. One of the things I pride myself on is being a good gift giver. I used to be a last minute shopper, like, the day before Christmas- eek! but it was so stressful. Now I listen and take notes... waaaaay before the holiday season. Not only does this save money and time before December, but also it saves my sanity! I try to buy presents that the person will really enjoy, or that follows one of these categories: Want, Need, Wear, or Read. Here are some other things I like to gift:

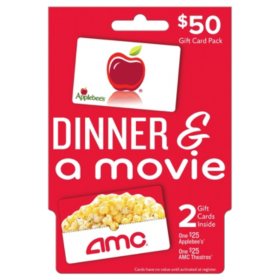
My favorite thing to give (and receive, tbh) are experiences. Gift cards to things like the movies, a nice restaurant, or something else I think you'll enjoy, I will try to give you that or take you there. 


Image result for amc gift card and popcorn

Emergency kits. How cute are these? There are a bunch of different varieties too- for him, for her, the bride, the teacher, the student, tech lover, traveler, etc. I bought the fitness kit and the college survival kit last year for my nieces and they loved them.


The Binge-Reading Kit by Pinch Provisions is designed with the book-lover in mind. This kit will help avid readers turn those pages with comfort and ease. Makes for the perfect gift; pair with a book to really impress! Contains 14 must-haves: Microfiber cloth, decision coin, bookmarks (3), ear plugs, lip balm, hand lot
Outerwear accessories. It's winter. Everyone gets cold right? So what person wouldn't want a cozy scarf, touch gloves, or even fuzzy socks?

Image result for HINDAWI Winter Slouchy Beanie Gloves for Women Knit Hats Skull Caps Touch Screen
via

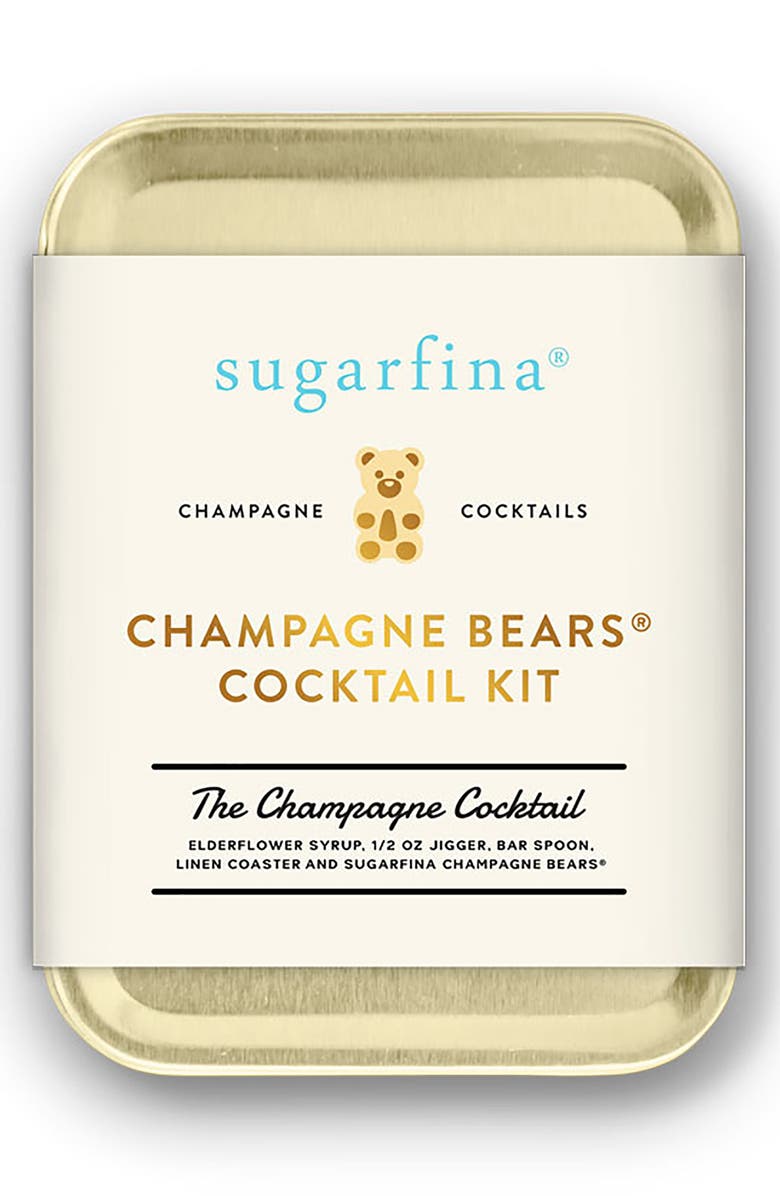
Hot Toddy or Cocktail gift sets. Usually I put these together myself- all you need is a mini bottle of alcohol ($1), a few tea bags (I usually get a spiced variety), maybe some honey, and a cute mug and boom! Perfect, not to mention inexpensive, present! If you prefer to buy one, Nordstrom has a variety of different cocktail kits. Not a drinker? How about the hot toddy for the body sets?

SUGARFINA Carry-On Cocktail Kit, Main, color, CHAMPAGNE

Books. I don't buy books for myself, but if I know you fancy a certain author that has a new release or a famous person you love has a memoir (because everyone seems to have one these days), I'd purchase it. I also always get books for kids (and a toy, obviously, because kids).


Glassware/mugs. I love funny or sarcastic mugs and wine glasses. And everyone I know drinks either coffee, tea, or wine, so it's a useful, fun present for anyone!


My Favorite Season is the Fall of the Patriarchy Coffee Mug
via


Ornaments/collectibles. I like giving personalized ornaments, or ones with a picture in them- memories forever! And if I know you have a collection or love of a TV or movie, I'll try to add to it in some way. Those Funko Pops are fun to give, and they seem to have one for everybody!


Image result for most popular funko pops 2019

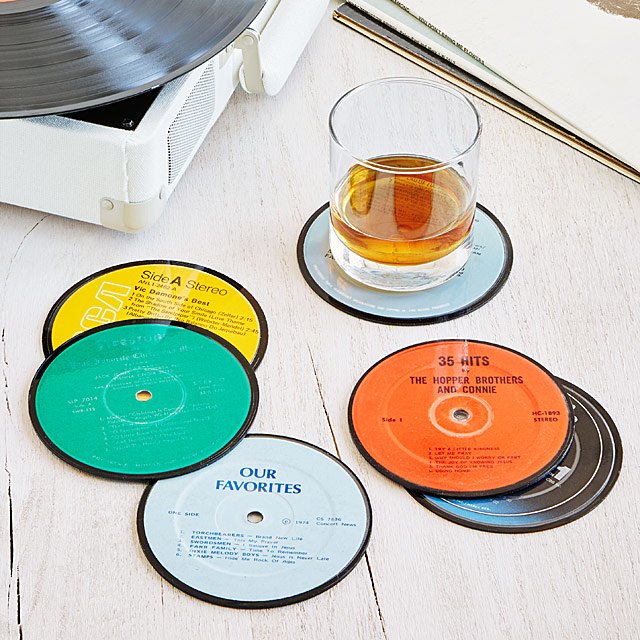
Hobby-related. I may not share your hobby, but I will try to find a gift to support it! Runner? Happy feet pedicure set or medal/bib display rack. Hiker or yogi? Daypack or yoga mat bag. Photographer? Lens mug. Musician or music lover? A cool retro-style speaker or record coasters... it's not hard. Think outside of the box!


Upcycled Record Coasters

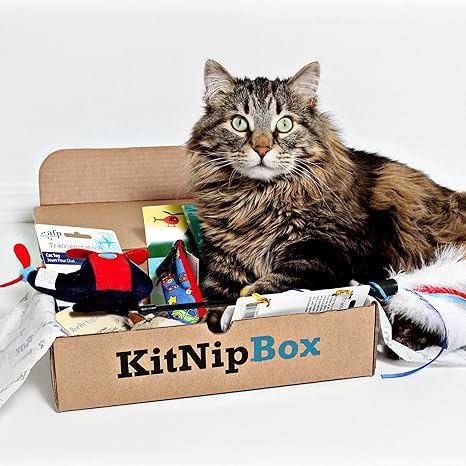
Pet care/related. Can't forget about your furry family members! I've never met a pet parent who didn't like something relating to or for their pets. 1 month subscription to KitNip Box or Barkbox, homemade dog treats, or just toys in general are always welcome!

Image result for kitnipbox

Grooming/beauty. I don't know any women who don't like a little something beauty related, whether it be makeup palettes, nail polish, or maybe something to help them relax like lavender oil and an eye mask. Got a metro guy in your life? There's a grooming set for him too!

Men's Groom-On-The-Go Set

Bonus: snacks. I don't like showing up to a dinner or party empty handed, so if I'm not bringing wine or a dessert I usually bring snacks like this Bourbon Almond Brittle.

Bourbon Almond Brittle


What are some of your favorite gifts to give?
Linking up with Whitney!


Thursday, September 5, 2019

August Recap and 10 Tips for a Garage Sale

I'm not gonna lie, I don't have a whole lot to share about where I was and what was going on with me last month. It can be summed up in precisely one word: work. I know that's hella boring and no one really wants to read about that, but to say my life was consumed by it would be a huge understatement. And normally I don't talk about work because Um, hello? See above. But in this case, it just cannot be avoided. 

Short story: my place of employment was cyber-attacked, and when I say attacked, I don't mean "oh, we were "offline for a few hours."  I mean every.single. system was down- we had no internet or wi-fi, no email even, for over a week. I mean every single laptop, desktop, device had to be "cleared" before we would let people have them back. Right at the beginning of the semester. 


I work at a technology school. In the IT department. Who do you think "clears" those machines? People in my department, myself included. So my life has been nothing but workworkworkworkwork (thanks Rihanna) for 3.5 weeks straight. Every single day (weekends included), 10-15 hour days, non-stop. Which really doesn't leave a lot of room for blog fodder, you see? 

I did take off one Saturday though, to host a pre-planned garage sale at my apartment building. My neighbor Raven and I had invited the other 6 apartments to join, but they didn't. Whatever, their loss! (Funny aside: last night my upstairs neighbor texting me saying she couldn't get her act together in time to join the first time, so she's doing one alone this Saturday! I can't join because I'll be away, but I shared these tips and our original flyer with her and she was very appreciative!) Anyway, we each made about $350 from our "stuff," and that's not even including any furniture, just smaller items! Not bad, if I do say so myself! And this was my first ever garage sale, so I decided to share my top ten tips for hosting one!


Start planning early. 
Raven and I started talking about this about two months beforehand, because summertime is hard and we needed to find the time to gather our stuff and a weekend when we would both be around (obviously). And we wanted to invite out neighbors to join with at least two weeks so they could put their stuff together too, if they wanted to participate. Once we had a date set, everything else was pretty easy, and we divided tasks (like who was making the flyer, putting them out, buying any necessary supplies, etc.). Also...
Set aside time to clean out, clean up, and dump. I'd been doing this sporadically for about a year, with piles of each. The "clean out" was for sale, "clean up" was for things that I either needed to take to the cleaners or alter slightly (like fix the zipper or replace a watch battery), and dump, well, literally throw out. 

Know the rules early- and share them!
My first assignment was making sure our landlord was cool with us hosting a garage sale, which he was, as long as we kept held it in our parking spaces and kept the driveway clear for our other neighbors. Next up was obtaining a permit from our local clerk's office, which only cost $5 but was a pain since they didn't have an online form and keep banking hours. This isn't a necessity, but it's good in case other neighbors complain or the cops show up, just in case. Luckily we have a lot of (free) curbside parking by us, so that wasn't an issue. 

Gather any supplies you may need.
I purchased a 4 ft table for displaying items, but I know I'll use it in the future for various parties and get-togethers as well. I also bought a clothing rack to hang clothes that I was selling. Not sure what I'm going to do with it now, but it does stow away neatly in my closet! Raven also bought directional signs from the Dollar Store to direct traffic since we live down a one way street. We put them in our cars literally directing people with arrows toward our little complex, but it worked! 

Advertise! 
We did a LOT of advertising. Raven made flyers (and grabbed some plastic protectors in case it rained), and I hung them at the local grocery store, post office, library, liquor store(s), bus and train stations. I actually ran into one of my friends while I was hanging one at a train station, and he offered to display a flyer on his truck. The next day, my cousin from 5 towns over told me she saw that flyer on a truck in a local BJ's and considered going! 

We also advertised on social media. Blue and I had it on our personal Facebook pages, but she also posted it on numerous "Buy/Sell/Trade" type Facebook Groups she was a part of (or joined for this purpose), and Raven posted it on Craigslist. 

Price and clearly label everything. 
This was my biggest mistake. I didn't do this in the beginning, because I was still putting my stuff out. Raven had this part completely under control. Every clothing item was between $2-3 dollars, shoes either $5-10 (depending on wear and tear). She had even purchased price stickers from the Dollar Store that I stubbornly refused to use at first. But as I was still putting my stuff out a big wave of people came in, asking how much every item was. I was flying by the seat of my pants for most stuff (especially clothing), so one minute I might say "$5!" and the next, to a different person (or the same, honestly they were coming at me so fast and it was before my coffee so I couldn't tell) I'd say "$3!" and the original customer (never the same customer, obviously) would overhear and be like, "But you just told me it was $5!" I learned this lesson FAST, and immediately starting putting price stickers on everything! (That's not to say I didn't leave room for haggling, I did, for certain items.) 


Decide your goal(s) beforehand. 
My goal was to sell items for a fair price. I wasn't going to go below a certain amount for some items though, because I didn't have to, and I knew they would earn me more if I sold them elsewhere. Raven's goal was to sell of as much as possible, regardless of price, because she's moving out (and into her bf's place, which has less space). "If I get even $2 for it instead of nothing, it's worth it!" was her motto, because she wasn't planning on bringing anything back into her apartment. In that case...
Watch the clock. You should be lowering the price by the hour. The later it gets, the cheaper the items should get, so that you're practically giving it away by the end... if that's your goal.

Start putting stuff out early on Garage Sale Day. 
I cannot stress this enough. Maybe it was because we planned for our sale to start at 9 instead of the usual 8AM, I don't know, but customers were pouncing before we were even fully set up. And that was STRESSFUL! So yeah, make sure you set up at least 30 min before your advertised start time, because people WILL show up! 

Don't forget the change!
Literally go to the bank- we each started with about $150 in small bills.

Don't hover.
This may just be a personal pet peeve, but I hate it when salespeople watch me like a hawk when I'm perusing their wares. Whether it's a garage sale or in a store, it is an instant turnoff for me, and I will walk out almost immediately if I notice them hovering around me for anything other than the simple "do you need help with anything?" before walking away.

Have a plan for leftovers.
Raven was literally throwing out anything she didn't sell. In my case, I'll post a lot of my clothing (especially those with tags) on Poshmark. Non-clothing items I'll attempt to sell on FB Marketplace, otherwise I'll donate. This is why I wouldn't sell these items for dirt cheap. I know I can make money on them if I sell them somewhere else, and I'm in no rush, so I'd rather keep them a bit longer and be patient than just get rid of them. It's definitely helpful to try to decide what you plan to do with your unsold items beforehand though! 


So there you have it, where I've been all month and some things I learned. 
Have you ever held a garage sale? Got any tips to add?
Linking up with Kristen and Penny! 

Thursday, February 21, 2019

How I Do: Planning

Hi Friends! Today I'm super excited to be joining Alexandra and Lauren to talk about how I organize my planner! I will be the first to admit that I'm not a "#plannergirl" by any means. I don't buy a shit-ton of stickers, I've never used washi tape, and though I love looking at pretty, creative planners, I've found that simple works best for me. I've been using some sort of paper planner for the last 10-ish years, and I always get a Jan-Dec yearly planner. I've tried electronic planners but they don't work for me; writing things down has always helped me to remember them better. I prefer horizontal to vertical layouts, and I like having both a monthly and weekly view. I keep a paperclip between the monthly view and whatever week I'm currently in for easier access for the most up-to-date info. I also use White-Out A LOT. But that's just me. I'm a huge supporter of the "do what works for you" method. Here is how I organize my planner in 3 steps. 

Image result for planners 101
via here

Step 1: Selecting and Purchasing Your Planner

I started with the "New York" planner that an ex bought me because I was/am directionally challenged and it included a NYC subway map (which I'll admit I referred back to MANY times). But then it was discontinued (around the same time we broke up). Around the same time I got more into blogging, and heard about Plum Paper Planners. I was in loooove. They were so big and pretty and personalized and all the other bloggers were using them! What's not to love?! The size and the $45 price tag, that's what. At the time I was commuting 4 hours a day, and it got heavy (and expensive!). And then I found the mini Happy Planner and I was SOLD. It's smaller and lighter but still had enough room to write everything I wanted, had sections for goals and inspirational quotes, was ring-bound but I could detach/re-attach  the pages (for smoother writing- I hate writing next to the edge/bounds), and had the hard plastic cover on top of the regular cover that I needed due to how rough I am with my stuff (especially when commuting). 


Usually, I buy my planner around November. Unfortunately I procrastinated this year and my mini Happy Planner of choice was no longer available. But I needed something, so I went to Staples and picked up a Blue Sky planner. It doesn't have as much space for writing as the Happy Planner (and inspirational quotes or cute covers for each month), but it does have the protective cover, it's small and light and has the horizontal (vs. vertical) layout that I prefer. 

Step 2: Filling In Your Planner
You purchased your planner, but now what? 

(A) Monthly view: Personally, I start by going back to last year's planner and fill in all of the important dates/birthdays. (First time using a planner? Write down anything you remember, like anniversaries or bill due dates, and then go to Facebook and write down all of your friend/family birthdays). These are things you KNOW will happen. I update this throughout the year as new events pop up. I have also started writing my goals in the "Notes" sidebar of my monthly calendar. 

Planner 1: Last year
Planner 2: This Year

(B) Weekly View: I don't write a lot in my weekly view because I don't reference it half as much as I reference my monthly view. Basically I write my meal plan on the second line (whether it's "tuna noodle casserole" or "Date Night!"), and whatever blog linkup/post on the 2nd to last line. Meals denoted with an asterisks are new. Occasionally I'll write what ingredients I don't have that I'll need to do the recipe in this section as well.


Step 3: Decorating Your Planner

I don't think anyone should tell you how to decorate your planner! This year I purchased these seasonal stickers from Amazon and though I used some of them, most of them are literally too big and probably meant for scrap-booking. That's okay, I'll probably use them for that purpose in the future, but I'm much more a fan of the productivity stickers like "dentist appointment" or "big meeting." Do what makes you happy! 

I'm curious- do you use a planner? 
If so, how do you organize it? 

Thursday, June 8, 2017

Summer Staples

Today I'm joining in Girl Chat to talk about my summer beach bag staples! It's been pretty cool and crappy here lately (as of yesterday I was still wearing my North Face!), but summer is my favorite season and I'm trying to get in the spirit, especially with it officially starting in just 2 weeks!  Here are my top 10 for a successful beach day!
Beach Bag Essentials


1. Sunglasses- I buy cheap ones because I'm forever losing or breaking them.

2. Sunscreen- I'm really bad at putting on sunscreen because I very rarely burn (once, maybe?). I try to put on at least 15, especially when I know I'm going to be out in the sun all day. I also make sure my makeup has SPF in it, but I hardly wear makeup in the summer!

3. Towel/blanket/chair- Honestly I like sitting more than laying out, but I also bring a towel in case I actually go in the water. This chair is perfect because it's low to the ground (also good for concerts), and has a strap so it's easy to carry.

4. Deodorant- I sweat like a man. I know it and hate it, but at least I've learned how to control it.

5. Book/Kindle- Though I won't do it when I'm with a group of people and socializing, I do love reading on the beach and in summer in general.

6. Portable music player- I love this one from SunnyLife. You connect it to your phone/iPod inside to protect it from the heat/sand/water. Smart!

7. Hair ties/hat- You know those commercials or pictures where the woman is standing on the shore, wind blowing freely through her long hair? That's not real life, at least not for me. My hair likes to get all up in my face with any passing breeze. I carry extra hair ties or those claw clips for this reason. Hats come in handy too, but I don't really look good in them.

8. Water- I like freezing a reusable bottle to take with me, that way it stays cool longer. I may have to invest in one of those Yeti stainless steel jug things everyone is talking about though.

9. Snacks- To keep from getting hangry, and for sharing. Because sharing is caring.

10. Bottle opener- Because it's always good to be prepared, especially if you're bringing along a cooler bag :)


What are some of your summer staples? 

Tuesday, April 18, 2017

7 Budget Tips

Do you remember how you got into blogging? I started with personal finance (or "pf") blogs. When I graduated college, I left with mountains of debt, crappy credit, and basically no real sense of how to handle money when I got my first job. Obviously I knew I had to pay my bills on time, but I had no clue how to budget the rest. So I found personal finance blogs, and read stories of how others got out of their debt- and became inspired and gathered tips that I could use to start to manage my finances. Here are a few that helped the most, and ones I return to time and time again. 

1. First, figure out where your money is going by actively tracking your spending. When I started attempting to take control of my finances, I did this for three months to get a total sense of where I was spending. Now when I need a financial "tune up" I'll do it for a month. It can be an eye-opening (and occasionally cringe-worthy) experience, but knowledge is power and once you know where you may be going overboard, you can start taking steps to correct it. 

2. Pay Yourself First! This was one of my biggest mistakes- not saving. I figured there was no room for savings- I was wrong. There's always room, and it really is a must. I started by establishing a set amount for an emergency fund. After that, I became really bad at saving again, until I started automating my savings. The thing is, if I don't see it, I can't spend it. It goes right from my paycheck to my savings account. So yeah... #3...

3. Automate savings and bills. This saves time and unnecessary worry because you won't be wondering if there was a bill you forgot to pay, and saves money because you won't have late fees. 

4. Shop at home before you go grocery shopping. Before you write your grocery list, dive into the freezer, pantry or wherever you hide the things you bring home from the grocery or drugstore. It’s surprising how many of us duplicate purchases without realizing it, and there is some satisfaction to be had from actually using up those frozen or canned goods before buying more. (For more on how I save on groceries, click here.)

5. Define YOUR Wants vs. Needs. This may not sound like a budgeting tip, but it is. For instance, some people love to stay home and have all the comforts that that affords them, one of them being cable. I hardly ever watch TV, so cutting my cable was a no brainer. Some people may need their Starbucks or DD fix every morning; I like bringing my coffee from home and drinking it during my commute. Figure out what's a must for you and what isn't, and cut out the excess. (Here are some other things I won't pay for.) 

6. Delete all those pesky sales emails! Unsubscribe! I just started using Unroll.Me and it's wonderful. See a list of all your subscriptions and instantly un-enroll. 

7. Budget in the fun stuff for less. My local movie theater has 1/2 price movies every Tuesday, and I bring my treats from the Dollar Store. I use Groupon and Living Social (with Ebates) for local deals. BYOB is my friend. 


What are some of your budget tips? 

Tuesday, January 31, 2017

Favorite Make-Up Products

For the last year or so, I have been on a quest to find my "holy grail" in make-up and skincare products. While I'm still working on creating and retaining a proper skincare routine, I have found some of my favorite make-up stuffs and I'm excited to share it on Lauren and Bre's new link-up! Add it To My List will be a monthly installment of recommendations on anything you want- button below to see others' recommendations! Now on to the cosmetics!

[sorry for crappy photo]
Old Faves

Urban Decay Naked (original)- every color I could possibly need and lasts forever. 

Urban Decay Original Eyeshadow Primer Potion- obviously the best, tried and true. A little bit packs a punch.

Urban Decay 24/7 Glide On Eye Pencil- I received a set as a Christmas present and never looked back. It's a little hard to remove, which is just a testament for how well it stays on for the long haul. 

Maybelline Define-A-Lash- It would be hard to convince me that any brand is better than Maybelline for mascara. This one is my fave because it doesn't clump and makes my lashes look super long. I strive for length more than volume. 

MAC blush in Flirt and Tease [discontinued]- I stocked up on this on Ebay when I found out it got discontinued, as it is one of the few shades that looks good on me without being overwhelming. 

Smashbox Lash DNA [discontinued]- volume and length for dayssss, but it did get a bit clumpy. It was fine if I used one of those eyelash separator things. 


New Additions

Burt's Bees lipstick in Scarlet Soaked: I love the color and creamy texture. It's also quite moisturizing, but tends to bleed. Works well with...

NYX Wonder Pencil: I forgot where I heard about this one, but it's supposed to conceal blemishes, stop lipstick from bleeding and fading, and brighten eyes if used as an eyeliner on the waterline. I've never used it as a concealer, but it's great used as a neutral lip and eye liner. It stays put throughout the day without drying out your lips which was a huge deal for me because I love creamier lipsticks. 

Covergirl Queen Collection Stay Luscious lipstick in Passion: I received this in an Influenster box and was skeptical that the bright color was too bright. I don't wear a lot of lipstick and when I do, I tend to stick to more subdued shades but this pink-red would work well on just about any skin tone. It's not sticky and stays on well through multiple cups of coffee or wine, you pick. 

NYX Studio Effect Photo-Loving Primer: I've never used a primer before, so I wanted to start with a clear one that was inexpensive but also had solid reviews. (Also, Jill recommended it on Steph's blog, so I knew it had to be good.) 

Rimmel soft kohl eyeliner: Goes on smoothly, and stays there. What more do you really need from an eyeliner? I always keep this in my bag for on the go touch ups. 

Smith's Rosebud Salve: I don't know what took me so long to try this stuff, especially since I love the smell of roses, but I love it. It actually acts more like a lip treatment for me especially in winter when my lips tend to crack and chap fairly often. And a small tin lasts for a really, really long time.

Sephora Bright Future Gel Serum Concealer: I love the gel-to-powder formula and the sponge-tip applicator because it makes it easier to apply without going overboard.  It's lightweight, blends well, and covers and brightens dark under eye circles. And they have a large selection of shades to match any skin tone.

Maybelline Fit Me Foundation (not pictured): I hardly ever wear foundation because I don't like the idea of covering my entire face with something and I feel like I'm wearing a mask. Also I feel like it gets on everything, and since I don't wear it often, I'm always touching my face when it's on. But if I do wear it, I like the shades and feel of this one. It also blends easily.

Favorite Dupes:
E.L.F. Shadow Lock Eyelid Primer- Picked this up because I didn't want to pay for the UD one. It doesn't work as well, but a solid back up for $2. 

E.L.F. Baked Eyeshadow Trio in Peach Please- I forgot my coveted Naked palette when I headed to VA for a wedding. For reference, the colors are comparable to Virgin, Toasted, and Dark Horse from the Naked palette. (Website says online only, but it's available in just about any drugstore.)


What are some of your tried and true make up favorites? 


Wednesday, December 7, 2016

Wanderlust Wednesday: Top 10 New Orleans

I've mentioned that I'm heading to New Orleans tomorrow for my birthday. I've been wanting to go to NoLa for several years now, and I am BEYOND excited! I am one of those people who plan vacations down to the hour not because I have to, but because I love doing it. Also because it's rare that I visit the same place twice, so I want to make sure I see everything I want to in case I never make it back there. Also, I'm a planner. I'm a list maker. I used to be more spontaneous but as I've gotten older I like to know what I'm doing and when. (This also makes packing easier.) I also like to ask friends who have been to the area to send me recommendations- unfortunately for this particular location, a lot of my friends visited in conjunction with a bachelor/ette party and honestly didn't remember where they went! But thanks to you bloggy friends who shared their trip high and lows with me! I'm not sharing my itinerary because stalkers, but here's what I plan to see/eat while I'm there!

New Orleans Top 10 List

A One-Day Itinerary for New Orleans' French Quarter:
Cafe Du Monde- a New Orleans institution!

Get jazzy with a wedding aboard the Steamboat Natchez, the last authentic steamboat on the Mississippi River.:
steamboat ride down the Great Mississippi!

The 50 Best Foods to Eat in New Orleans:
dinner at Chef Job Besh's "Luke"

Beginner's Guide to New Orleans >>> This has everything from food, activities, volunteering and bars. Great list of headed to this vibrant city!:
live jazz at Preservation Hall

Recipe: Traditional New Orleans Hurricane Ingredients 2 oz. light rum 2 oz. dark rum 2 oz. passion fruit juice 1 oz. orange juice 1/2 oz. fresh lime juice 1 Tbsp. simple syrup 1 Tbsp. grenadine Ora...:
hurricanes at Pat O'Brien's

The Twirl! is a Gay Heritage and Drinks tour. Saturdays and by appointment. Departs from Little Vic's, 719 Toulouse Street or your hotel. Reservations are required. The first drink is graciously provided by our sponsor, Cathead Vodka.:
The "Twirl" Tour

Willie Mae's Scotch House in New Orleans has America's best fried chicken. The rest of the food rocks too.:
no caption needed

Blue Hawaiian Nog  created by New Orleans’ Arnaud’s French 75 Bar, winner of the Tales of the Toddy‘s first-ever Bourbon Spiked Eggnog Competition:
hot toddy and food competition!

Christmas 'supper' in New Orleans:
classic Reveillon holiday dinner

12 Things You Absolutely Have To Do In New Orleans This December | A dozen ways to embrace the seasonal cheer...:
lights and train ride through Celebrate the Oaks

Other stops not pictured include The Gumbo Shop, Jackson Square, a jazzy brunch, and Central Grocery- home of the muffaletta! (I've never had a muffaletta. I don't even know if I like them, but I'll find out this week!)